Secure Shell (SSH) runs on port number 22 and used for the purpose of secure data communication over an unsecured or less secure network. With SSH, Remote code execution became easy with SSH. Running on the top of TCP/IP for securing the data over the network makes it a transport layer protocol. But when used for the remote login purpose, we call it an application layer protocol. Secure socket sell is another name to this network protocol introduced in the year 1995.
SSH uses a client-server architecture. Consists of multiple utilities that work together to help secure communication by using encryption and authentication. Hence, we prefer SSH over services like Telnet and FTP.
Pre-Requisites:
- Symmetric key cryptography: Using the same secret key to encrypt and decrypt anything. For example when a folder named xyz is locked using a password in Pendrive of a person named A. Giving some sensitive information to B through Pendrive, when B unlocks the folder using that same password only.
- Public Key cryptography Involves two different keys (Public key & private key) for both purposes. For example, a chairperson of a company ask employees to make a document. The employees know a public key and use that to encrypt and send it to their boss. Now to decrypt the document so that he can open it, He uses his own private key.
The SSH Schema
The SSH Schema consists of following components
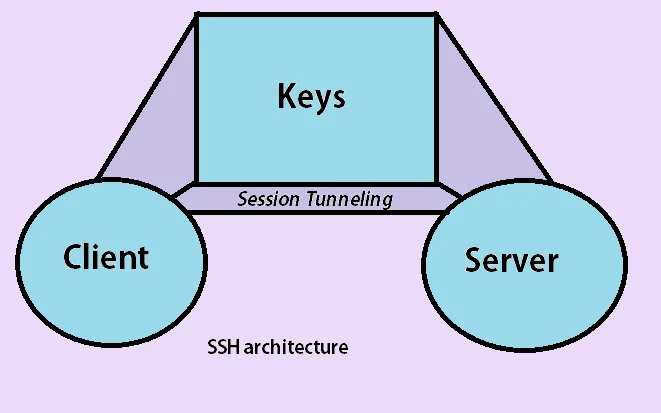
- Client: Like any other service utilizing the request-response model, a client needs to be there to make requests like login, create files or show directories, etc.
- Server: ‘It’s like a ball to that bat named client’. So the client interacts with the server through requests and responses to those requests. The server takes requests and acts accordingly if authenticated successfully.
- Keys: The component of security and authentication here managed by keys. So when a client establishes a connection, authentication of the user & the machine being used takes place. The user public key & host public key enables the server to identify the user & host machine. After establishment, the server public key encrypts the session created and the session private key protects the communication during that session.
Working of SSH
The communication uses TCP port 22. The listening process for coming connections takes place on port 22 of the server while the client machine uses the same port number to send packets.
- TCP Handshake: The first step involves the TCP handshake to establish a connection and verify the user credentials. So whenever the TCP initialization packet gets positive acknowledgement (negative acknowledgement means that the server don’t recognize the client or vice versa)
- The next step requires both the client and server to agree upon the policies and algorithms supported during the whole process for tunnelling.
- If both agree over the policies and supported algorithms match, the generation of the public key takes place. Both client and server use this public key at their end.
- Few examples of the algorithm are AES(Advanced Encryption Standard), SHA(Secure Hash Algorithm), RSA(Rivest Shamir Adleman), DSA(Digital Signature Algorithm)
- Now to interact with that public key in order to decrypt the data packet, a new private key generation takes place.
- Along with private and public key, one more key involved is the secret key which is used with private or public keys to encrypt or decrypt the message.
- Now the user needs to enter the credentials to verify the identity and interact with the server in a private session. (Nowadays, we use SSH key pairing method. Will explain this any other blog someday)
Walkthrough Example & Commands:
Steps: Connecting via SSH through Powershell or terminal
- To connect with a remote server you need two things only.
- IP Address of that server
- Username for that server
Note: If the login is setup using a password, you need a password and if using keys, then via that key file. Also if the connection is using the default port at the listener, you need nothing else. But if the ssh listener is using any other port number like 29302 then you need that.
- Suppose the IP address of that server we want to connect is 192.168.1.23 and the user name is admin1233453
- Just go to the terminal or PowerShell l and type this:

ssh admin1233453@192.168.1.23 (For default)
ssh –p 29302 admin1233453@192.168.1.23 (for custom port)
- Now type your password and press enter.
- You are in. You can use Linux commands like ls, cd, etc.
Steps: Connecting via SSH through PuTTY client. Download here
- Install it on your OS.
- Run PuTTY client and enter the IP Address and port (If custom)
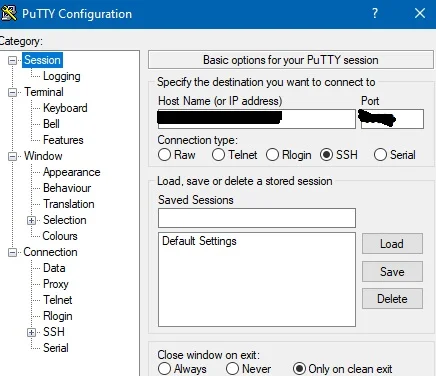
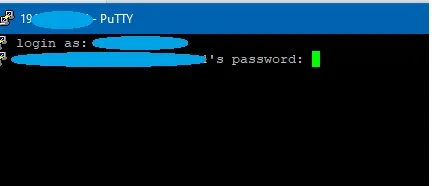
- In the prompt, enter your username and password to sign in.
- Use Linux commands to do your work.
Attacks and Security:
- SSH brute force attack
In this type of attack the attacker tries to brute force SSH servers to get logged in.
- Port forwarding attack
This attack enables the attacker to get inside of the restricted hosts. To understand this, let’s take the example of a school or college network. So suppose your college has an internal network plus it is protected through the firewall for internet-related transactions. Now you are also connected to the internet but being an outside network packet, you are not able to enter the firewall. Now suppose if you can use the same firewall`s SSH service for the purpose of interaction with the internal network to compromise that. It sounds shocking but it is possible with port forwarding.
- With keys
Things have changed to a great extent. But the careless or lazy attitude of employees sharing the keys to save effort creates a huge risk.
Mitigation
- Never use the default port for SSH
- Use firewalls and filter the SSH
- Never use default credentials
- Rate limiting of an attempt to login helps a lot
- Update regularly.
Learn about DHCP Protocol in our computer network series here.


